Overview
Define your goal
Title, description, success criteria, due date
Stake tokens
Choose how many tokens to put on the line
Choose a partner
Pick from recommended partners, search, or invite by email
Submit evidence
Upload proof when your goal is done
Partner reviews
Your partner approves or rejects your submission
Outcome
Tokens returned on success, locked on rejection
Open the goal creation flow
Log in to Veltrune. On the Dashboard homepage, tap the Create Goal button in the top-right corner.
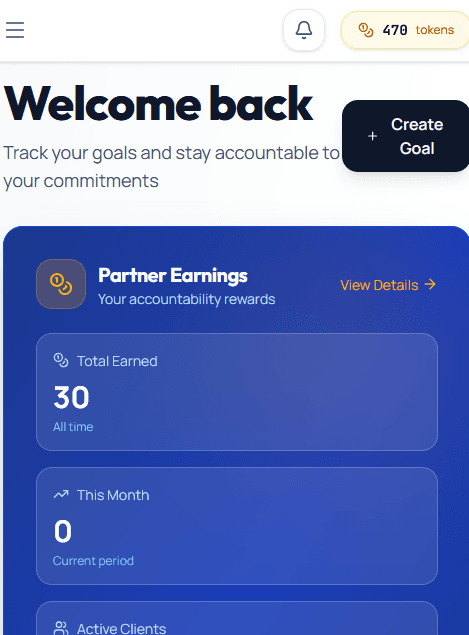
Tap Create Goal on the Dashboard homepage to open the goal type modal.
A modal appears asking you to choose a goal type. Tap Single Goal to create a short term goal.
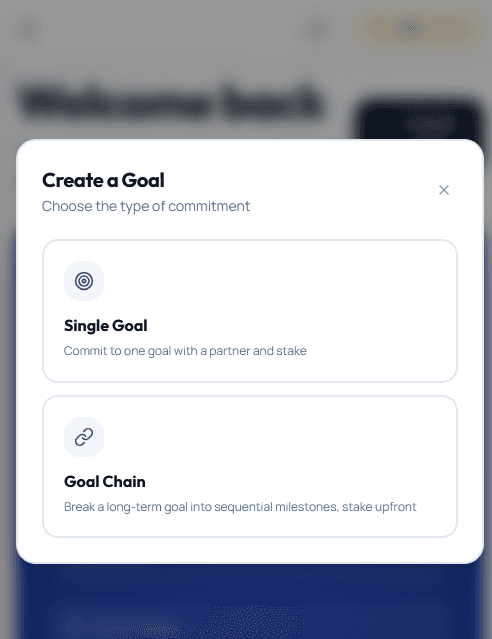
Tap Single Goal to start the three-step creation flow.
Define your goal
For a short term goal, it should be something quick. Something you can finish in a week or less.
Fill in the four required fields:
- Goal Title — a short, specific name (e.g. “Read one chapter of the law of contract textbook”)
- Description — what you want to achieve and why
- Success Criteria — the specific evidence that will prove you completed it (e.g. deployed URL, screenshots, completion certificate)
- Due Date — the date by which you commit to finishing
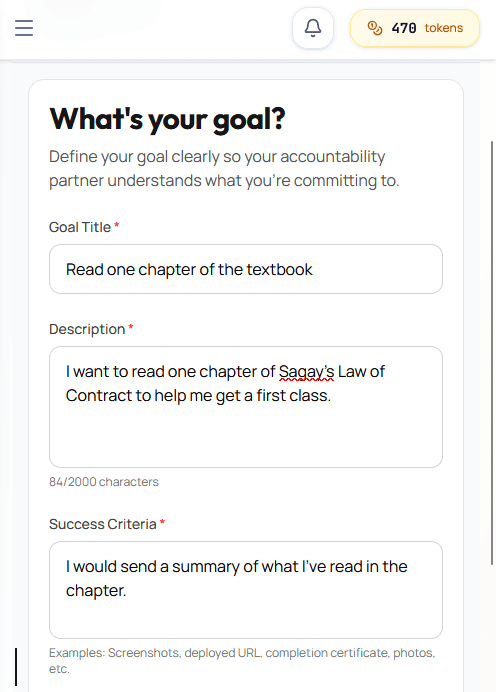
Fill in all four fields, then click Continue to Stake Tokens.
Click Continue to Stake Tokens when all fields are filled in.
Stake tokens
Choose how many tokens to stake on this goal. The minimum is 100 tokens. Your current available balance is shown at the top of the screen.
Each new user gets 100 free tokens on signup. So you can set your first goal for free.
As you enter an amount, you'll see a live breakdown of how the tokens split if you succeed:
- 80% — returned to you on approval
- 10% — partner fee (earned by your accountability partner)
- 10% — platform fee
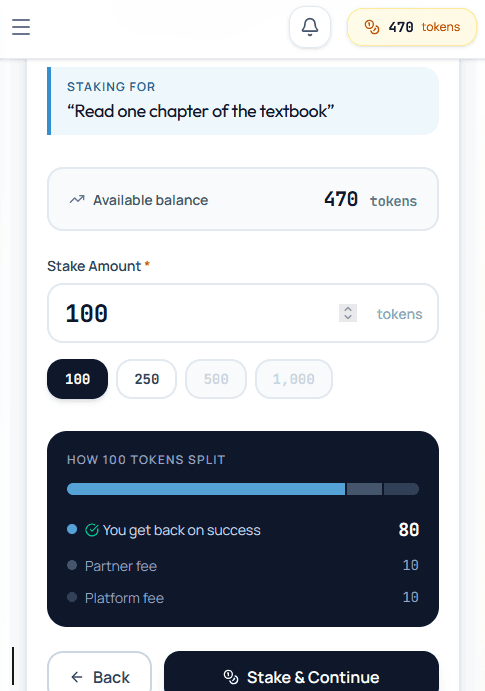
Enter your stake amount and review the live token breakdown before continuing.
Click Stake & Continue to lock in your stake and move to partner selection.
Choose your accountability partner
Your accountability partner is the person who will review your evidence and decide whether you completed the goal. Choose them from one of three tabs:
Recommended
Partners matched to your goal based on its title, description, and criteria. Click Send Request on any card to invite them.
Search All
Browse the full partner directory. Type a name or area of expertise into the search box and click Search.
Invite a Friend
Know someone who isn't on Veltrune yet? Enter their email and an optional personal message. They'll receive an invitation to sign up and accept.
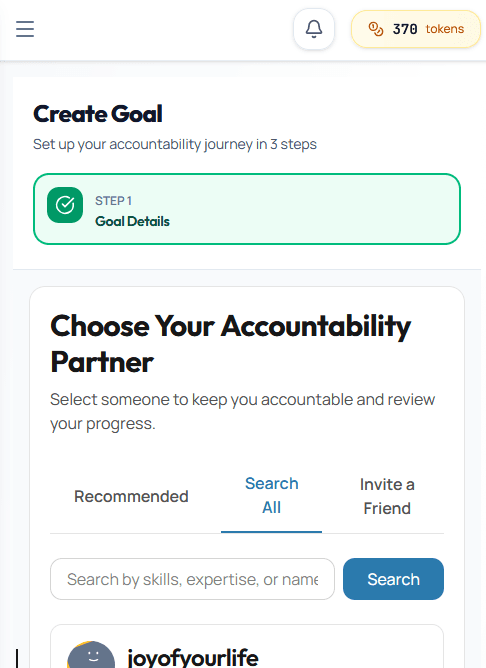
The Recommended tab shows partners matched to your specific goal.
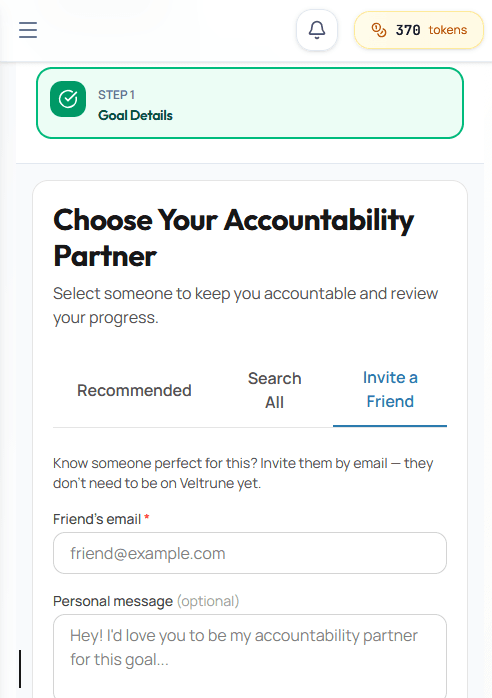
Use the Invite a Friend tab to invite anyone by email — they don't need an account yet.
Your goal is now active
Once your partner accepts, your goal status changes to Active and the countdown timer starts. You now have until your due date to complete the goal and submit evidence.
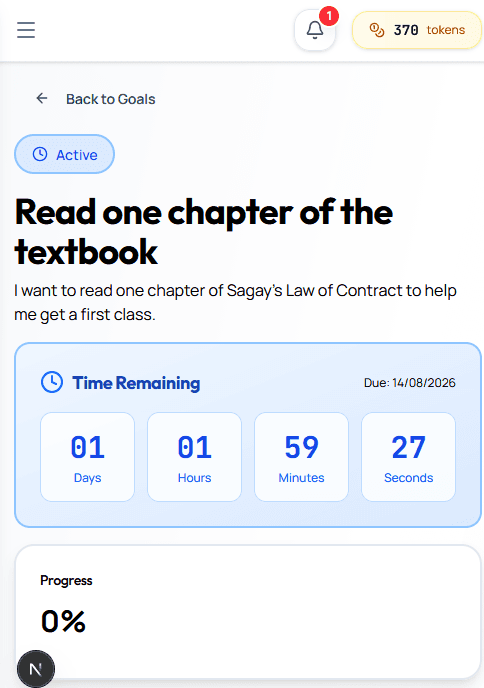
The goal detail page shows the countdown timer once your goal is active.
Message your partner
While your goal is active, you can message your accountability partner directly from the goal page. Use this to share progress updates, ask questions, or provide context before submitting evidence.
Open the goal from your Goals page and scroll to the Messages section. Type your message and tap Send.
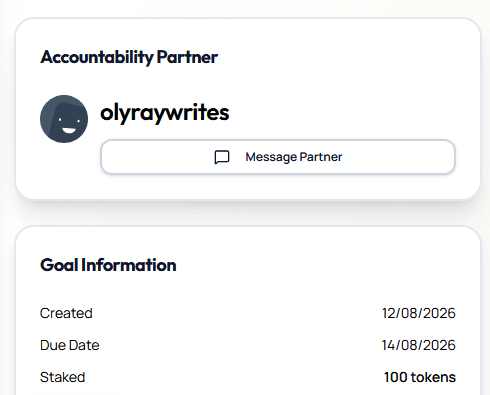
The Messages section on the goal page — both you and your partner can send messages here.
Submit evidence
When you've completed your goal (or made progress worth documenting), open the goal from your dashboard and scroll to the Goal Evidence section.
In the Submit Evidence panel:
- 1Upload files that prove your completion — images, videos (up to 200 MB), PDFs, DOCX, or other documents. Up to 5 files per submission. This is optional
- 2Add a written description with any context your partner should know.
- 3Click Submit Evidence.
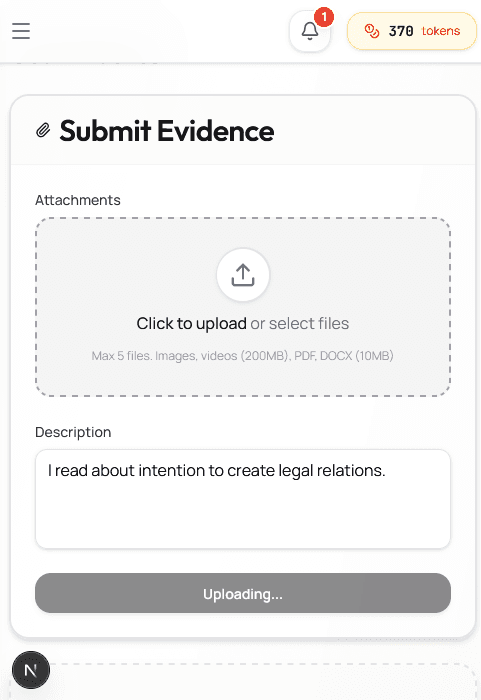
Upload your files and add a description, then click Submit Evidence.
Partner reviews your submission
Your partner receives a notification that evidence is waiting. They have a set deadline to review — shown by a countdown on both your goal page and theirs.
Your partner will review each piece of evidence, then make a final decision on the goal: Approve Goal or Reject.
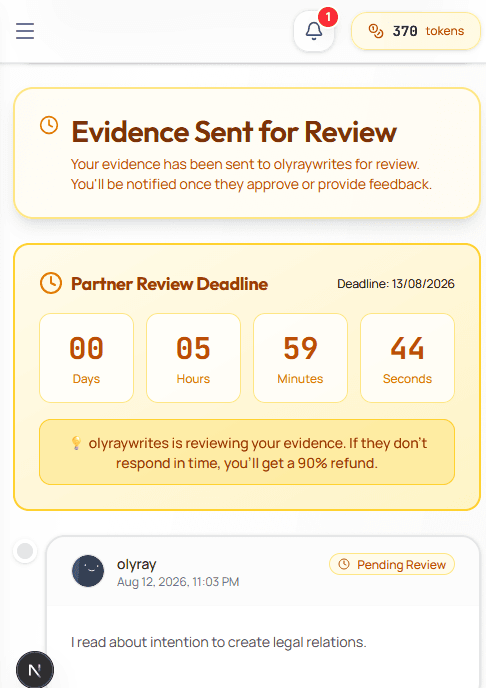
The goal page shows an “Evidence Sent for Review” status while your partner evaluates your submission.
Outcome
Approved
Your partner confirmed that you met the success criteria. 80% of your staked tokens are returned to your balance. Your partner earns their 10% fee. The goal is marked Completed.
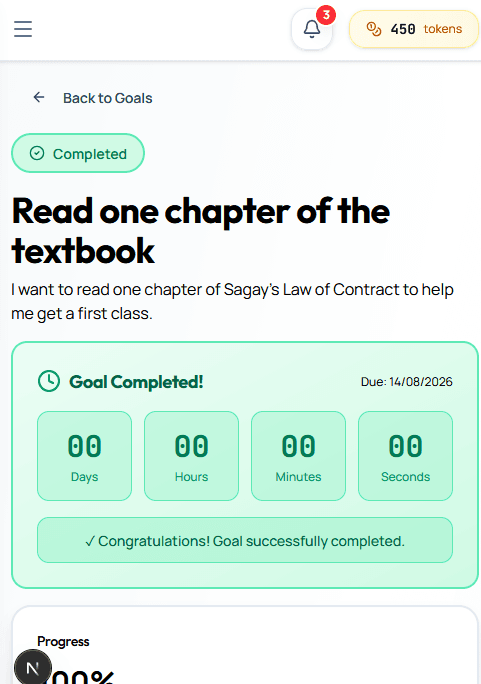
The goal is marked Completed and your tokens are returned to your balance.
Frequently Asked Questions
What if my partner doesn't respond to my request?+
The request expires after 24 hours and an admin is automatically assigned as your partner, so your goal always gets a partner.
What if my partner doesn't review my evidence in time?+
The goal is auto-approved and your tokens are returned to your balance.
Can I submit evidence more than once?+
Yes. You can submit multiple evidence entries before your partner makes their final decision.
What files can I attach?+
Images, videos (up to 200 MB), PDF, DOCX, XLS, CSV, ZIP, and audio files. Maximum 5 files per submission, 50 MB each (except video).
What happens if I miss the due date?+
Your goal is marked Failed. 80% of your staked tokens are locked (10% goes to your partner, 10% to the platform).
What is the minimum stake?+
100 tokens.
Ready to set your first goal?
Commit to something meaningful and stake your tokens.